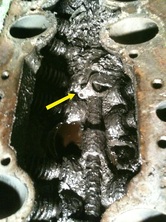
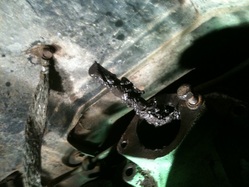
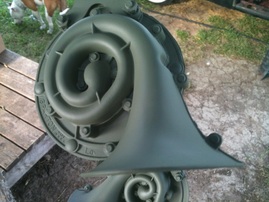
 I thought I'd get the blog up to speed with my progress so far. The nasty tapping noise coming from the engine turned out to be one of my valves. I figured it would be something simple, or was hoping it would be. Turns out a valve spring retainer, pictured on the left, had jumped off allowing the cam to slap the valve and make a nasty racket. Not to mention the valve never closing all the way causing that cylinder to not work properly and the motor to run all wonky. I had heard that the filtration on these old flatheads was less than adequate and I was expecting a pretty nasty mess inside but I was unprepared for what awaited me under the intake manifold. It looked like a tar pit I expected to find a mammoth skeleton in there. The Sea Foam treatment that I had tried to free the valve with, I thought it was just stuck, was sitting in little pools in the sludge. It was thick, it was messy and it was disgusting. My mind reels at the thought of what the inside of the oil pan is like. But With some elbow grease, and the help of a good buddy it was all cleaned up. 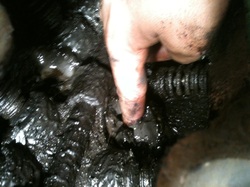 This is my index finger buried to the first knuckle in motor gunk. GROSS! I researched more advanced oiling systems for this motor, and there are a number of options. From a very simple upgrade to a more efficient old style filter all the way up to a complete overhaul that involves routing an oil line through the oil pan and replacing the pump with a higher volume one. This would entail a rebuild also and at looser tolerances, plus the kit was 400 bucks. That option was out. It seemed the best way to go was the 95% system which involves drilling new oil passages and plugging up existing ones to reroute the current system into something that resembles a more modern one. In other words something that sucks a lot less. This seems like the best option, but there's a catch it does involve drilling into the block, and unless you plan on a thorough cleaning and rebuild this isn't something you really want to go and do. So my thoughts are to go with a hybrid of system made up of a remote mounted modern filter and most of the original system. Will it work? Who knows, but it will get the HIDEOUS and ridiculous filter mounted to the head out of the way and hopefully keep the oil from going Le Brea Tar Pit on me again. I knew I was in trouble when I pulled the fuel pump off to find the push rod in this condition. 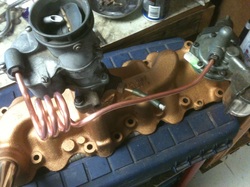 So I knew the lime green engine paint had to go. I read somewhere that at the end of '49 they painted some of the blocks bronze. This sounded good enough to me, so I thought I'd go for a bronze and black paint scheme. After paint stripping and sandblasting the intake manifold I gave it a nice coat of high temp engine paint. I thought some copper fuel line would look pretty cool and I figured why not put a pig tail in there for kicks. I began putting the loops in with a hand held tubing bender. It was apparent that this wouldn't work from the get go, too awkward and the tube kept threatening to kink on me. I began looking for other options and found the perfect solution, a bottle of Italian dressing did the trick. The neck of the bottle was the ideal diameter for the fuel line. 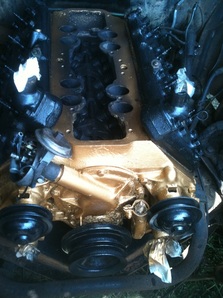 With the intake manifold squared away I moved on to cleaning all the road grime off of the engine, this no small task. I found that the previous owner didn't bother to do this before he painted it that woeful hue so a lot of the lime green scraped off with the dirt. After which I masked the engine and shot it in the engine bay. This is not the ideal way to paint a motor, but as a rebuild is not in the budget right now, I didn't think pulling the motor for a clean up and reshoot would be the best move either. I went with gloss black on the heads and pulleys and bronze everywhere else. This is what I ended up with. Solid gold right? Is it how the pros would do it? Not a chance, but to me a cleaner less lime green engine is a vast improvement. Now to check the valve lash and install the mainifold, carb, fuel pump, and all the other junk that goes on before she'll run again. I figured I'd say a little something about my horns. These cars came with a Hi and Lo tone horn system comprised of two separate horns. I thought they'd be shot after 63 years and had my eye on an OOOooga horn to replace it, but lo and behold a little 12V juice and they screamed back to life. What a noise too! I played one then the other. Then both together. I've never heard a more manly horn in my life. There's no way I could think of getting rid of them now. So I sandblasted them, shot them with etch primer after knocking the dents out of one of the domes and then finished them in gloss black. 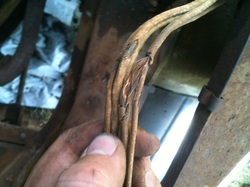 Finally I thought I'd include a word or two on my wiring, or more appropriately my lack of wiring. The pathetic bits of original wiring that is left in the car all look like this. In a word "Roached". It's a disgusting affair with original fabric loom that cracks off and turns to dust when you go near it. It is awful. I have ordered a new wiring harness and plan to dedicate an entire entry to the wiring debacle. With all signs pointing to a complete rebuild have I finally bitten off more than I can chew? Will I ever drive this car again? Can I repair this car before its rusts completely away? Tune in next time and find out.
2 Comments
frank fenwick
7/8/2012 04:50:31 am
great article.very interesting & informing to me.i have a 49 coupe that is ratty but love driving it. -frank
Reply
Ron Maskell
7/8/2012 09:30:20 pm
Very entertaining. Keep it up.
Reply
Leave a Reply. |
Categories
All
Archives
September 2019
GREen BibleAerostar CoilsFloorPans© 2018 Aaron Starnes.
All Rights Reserved. |



 RSS Feed
