|
After wrapping up the brake system tuneup on the 1949 Ford I started looking for the next challenge. Maybe for the first time since I bought the car, I didn't see a good reason I couldn't just drive it. For a 70-year-old car, it starts and runs with shocking reliability. Now that the brakes are all sorted out, it stops too. I wondered if I could manage to use this old car as my daily driver for a week. How would it fare on roads after seven decades of innovation?
4 Comments
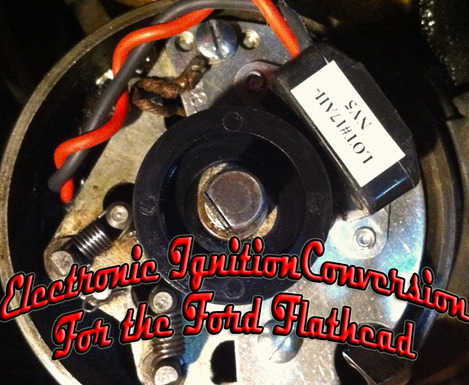
This entry is dedicated the installation of the PerTronix Ignitor electronic ignition conversion for a Ford flathead. I ordered this product based on the reviews describing it's simplicity and reliability. The reviews didn't lie.
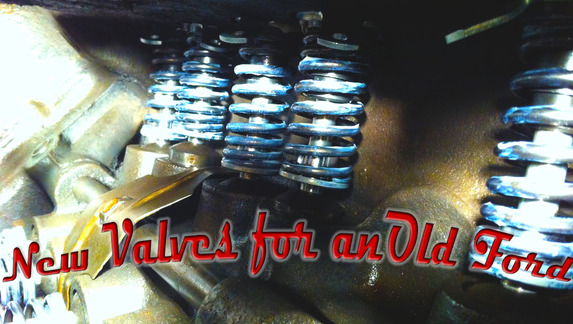
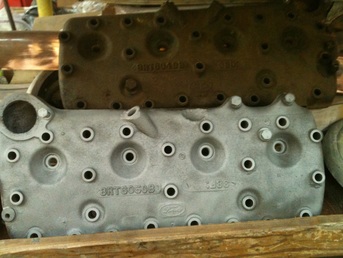
In a previous entry I mentioned a nasty tapping noise which I thought I fixed by installing a new valve spring retainer. I pulled the intake off my flathead and installed the retainer. I thought that I had the problem licked, but with very little driving the nasty tap tap tap came back. I knew to fix it for good I'd have to get in there deep. So it was off with her heads!
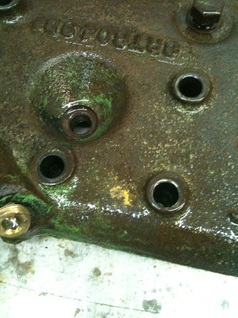
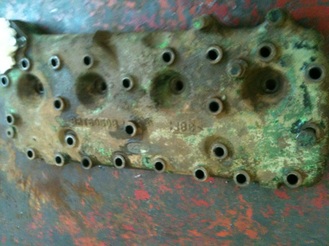
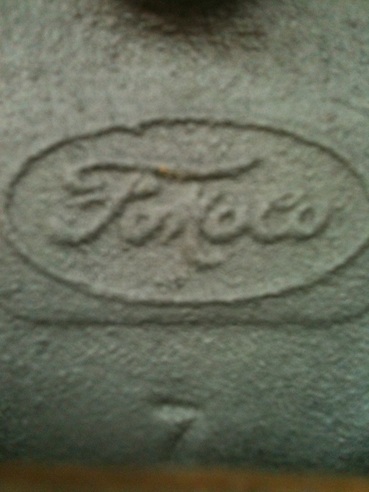
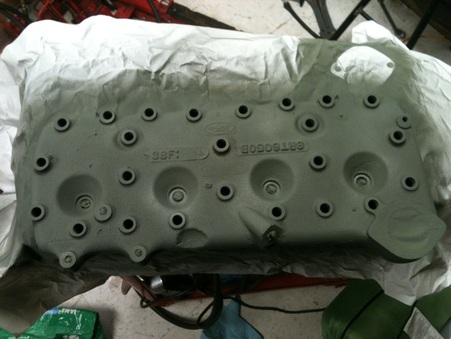
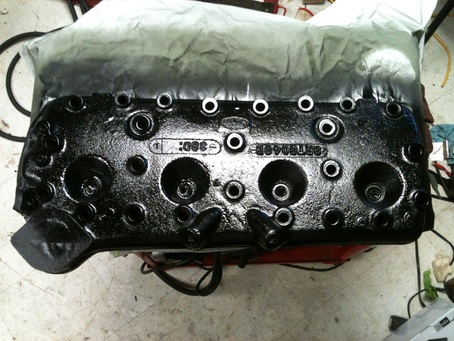
I had to pull the heads off of the flathead to do some repairs to my valve train so I decided while they were off I ought to gussy them up a bit. I started by stripping the paint They were still pretty nasty, but it was cool to see all the ancient paint colors underneath. So I took my time and sandblasted them both. Check out this sweet Ford Motor Company logo. Then came the primer, And then the high temp paint. Overall they came out pretty good.
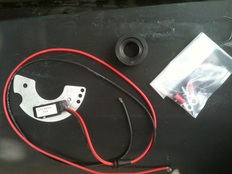 I wanted to write an entry dedicated entirely on the installation of my new PerTronix Ignitor electronic ignition conversion. After receiving it though I realized that there wasn't much to write on the topic. I ordered this product based on the reviews describing it's simplicity and reliability. The reviews didn't lie. Pictured at left is what came in the box. The ring on top is the "magnet sleeve" that fits over your rotor shaft. Bottom left is the receiver and ignition plate and on the right is the little baggy of hardware. What you see here is what you get save a sheet of instructions. The instructions are brief but thorough. They tell you in detail what you need to run their set up. 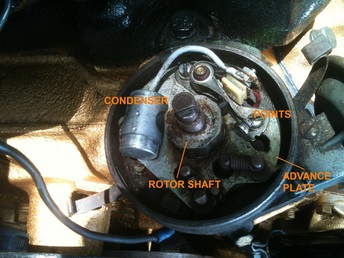 By that I mean all the technical stuff about what primary resistance your coil ought to be if you're running a 6 or 8 cylinder, wiring diagram, etc. Also if your coil happens to be 1.5 ohms of primary resistance you can eliminate your condesner. The coil I chose has 1.4, I'm hoping it's close enough but if not it's no trick to wire in the condenser. PerTronix offers it's own line of performance coils with all the right numbers for an idiot proof install. At right is the distributor with the cap and rotor removed. You can see the breaker points, condenser, rotor shaft, and vacuum advance plate. Most of this is removed and replaced with the new system. 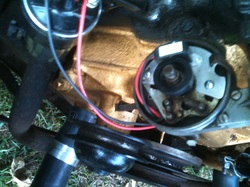 At left is the PerTronix system installed. It's clean, tidy and eliminates all those moving parts and in doing so eliminates potential problems. The kit replaces the points by screwing down the ignitor plate to the old breaker plate. this allows your advance mechanism to still do it's job. In my application this reduced clutter under the distributor cap by making a lot of the wires an junk related to the points useless. I removed all the old and put in the new in less than an hour. To finish up the installation I twisted the red and black wires coming from the distributor and sleeved them in heat shrink to protect them and give them a clean appearance. Then I cut the wires to length and crimped on the terminals, heat shrinked those, and wired up the coil. That's it. Easy peasy, and hopefully it will lend a bit of reliability to this old heap! One less thing to go wrong, right? Stay tuned to see if it actually works once I get her all wired up and try to start her up. 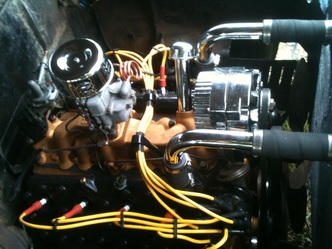 Dig the chrome radiator hoses Dig the chrome radiator hoses As the title of this entry promises there will be some engine tidy up. I sorted out or installed everything everything but the new oil system and my fuel line. But that can wait for another entry. I painted the base of my fuel pump gloss black, along with the wire brackets and the case breather tube. I ordered a brand spanking new flex fan but could not install it because the center hole was too small. I think I'll have to run a spacer but it will have to be a pretty custom little job as the fan is already nearly an inch from the radiator. So I'm thinking about ordering one and cutting it down to about 1/4" so it clears the radiator and the pulley assembly. I'll sandblast and paint the fan mount at that time. 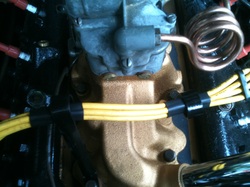 I thought I'd try to do a little neater job of routing the plug wires than I did the first time I installed them, so I did my best to keep them all going in on general direction relative to which side of the engine they went to. I also put some heat shrink around the wires going to the opposite side of the block where then went through the wire brackets. This keeps them nice and tidy and should prevent them from galling on the brackets. I organized the wires with the clips provided with the wires although I did have to modify one. This looks pretty good, but there are other options that look really great and protect the wires a good deal. With all this sorted I can move on to wiring up the car and getting to drive agai Onward and upward to the next challenge! Which would you rather see under your hood?
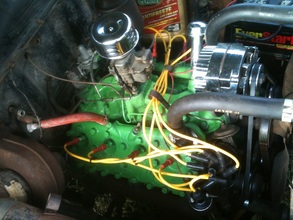
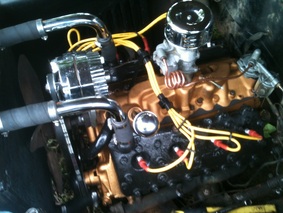
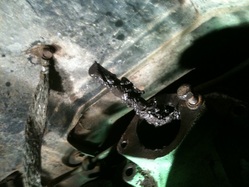
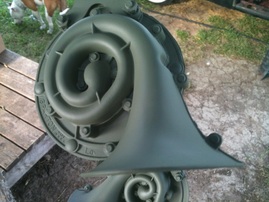
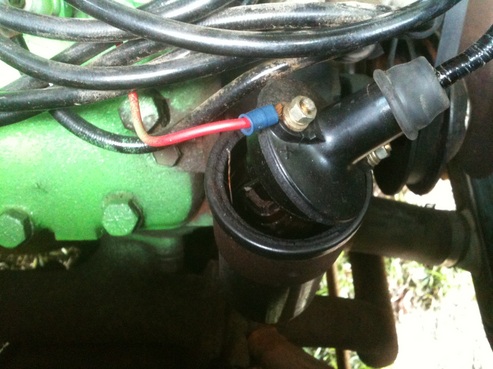
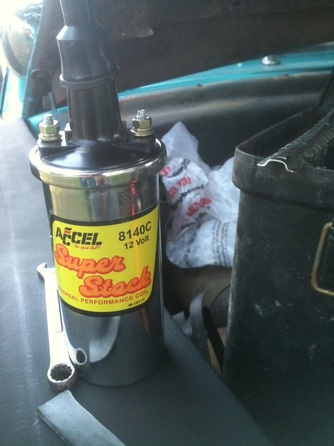
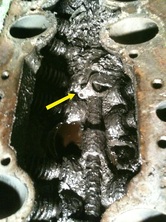 I thought I'd get the blog up to speed with my progress so far. The nasty tapping noise coming from the engine turned out to be one of my valves. I figured it would be something simple, or was hoping it would be. Turns out a valve spring retainer, pictured on the left, had jumped off allowing the cam to slap the valve and make a nasty racket. Not to mention the valve never closing all the way causing that cylinder to not work properly and the motor to run all wonky. I had heard that the filtration on these old flatheads was less than adequate and I was expecting a pretty nasty mess inside but I was unprepared for what awaited me under the intake manifold. It looked like a tar pit I expected to find a mammoth skeleton in there. The Sea Foam treatment that I had tried to free the valve with, I thought it was just stuck, was sitting in little pools in the sludge. It was thick, it was messy and it was disgusting. My mind reels at the thought of what the inside of the oil pan is like. But With some elbow grease, and the help of a good buddy it was all cleaned up. 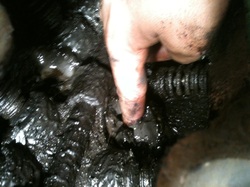 This is my index finger buried to the first knuckle in motor gunk. GROSS! I researched more advanced oiling systems for this motor, and there are a number of options. From a very simple upgrade to a more efficient old style filter all the way up to a complete overhaul that involves routing an oil line through the oil pan and replacing the pump with a higher volume one. This would entail a rebuild also and at looser tolerances, plus the kit was 400 bucks. That option was out. It seemed the best way to go was the 95% system which involves drilling new oil passages and plugging up existing ones to reroute the current system into something that resembles a more modern one. In other words something that sucks a lot less. This seems like the best option, but there's a catch it does involve drilling into the block, and unless you plan on a thorough cleaning and rebuild this isn't something you really want to go and do. So my thoughts are to go with a hybrid of system made up of a remote mounted modern filter and most of the original system. Will it work? Who knows, but it will get the HIDEOUS and ridiculous filter mounted to the head out of the way and hopefully keep the oil from going Le Brea Tar Pit on me again. I knew I was in trouble when I pulled the fuel pump off to find the push rod in this condition. 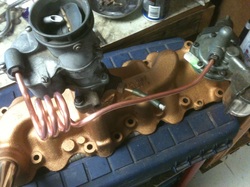 So I knew the lime green engine paint had to go. I read somewhere that at the end of '49 they painted some of the blocks bronze. This sounded good enough to me, so I thought I'd go for a bronze and black paint scheme. After paint stripping and sandblasting the intake manifold I gave it a nice coat of high temp engine paint. I thought some copper fuel line would look pretty cool and I figured why not put a pig tail in there for kicks. I began putting the loops in with a hand held tubing bender. It was apparent that this wouldn't work from the get go, too awkward and the tube kept threatening to kink on me. I began looking for other options and found the perfect solution, a bottle of Italian dressing did the trick. The neck of the bottle was the ideal diameter for the fuel line. 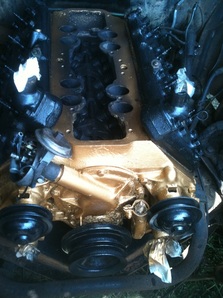 With the intake manifold squared away I moved on to cleaning all the road grime off of the engine, this no small task. I found that the previous owner didn't bother to do this before he painted it that woeful hue so a lot of the lime green scraped off with the dirt. After which I masked the engine and shot it in the engine bay. This is not the ideal way to paint a motor, but as a rebuild is not in the budget right now, I didn't think pulling the motor for a clean up and reshoot would be the best move either. I went with gloss black on the heads and pulleys and bronze everywhere else. This is what I ended up with. Solid gold right? Is it how the pros would do it? Not a chance, but to me a cleaner less lime green engine is a vast improvement. Now to check the valve lash and install the mainifold, carb, fuel pump, and all the other junk that goes on before she'll run again. I figured I'd say a little something about my horns. These cars came with a Hi and Lo tone horn system comprised of two separate horns. I thought they'd be shot after 63 years and had my eye on an OOOooga horn to replace it, but lo and behold a little 12V juice and they screamed back to life. What a noise too! I played one then the other. Then both together. I've never heard a more manly horn in my life. There's no way I could think of getting rid of them now. So I sandblasted them, shot them with etch primer after knocking the dents out of one of the domes and then finished them in gloss black. 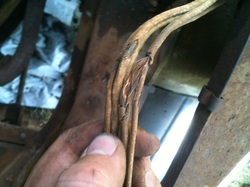 Finally I thought I'd include a word or two on my wiring, or more appropriately my lack of wiring. The pathetic bits of original wiring that is left in the car all look like this. In a word "Roached". It's a disgusting affair with original fabric loom that cracks off and turns to dust when you go near it. It is awful. I have ordered a new wiring harness and plan to dedicate an entire entry to the wiring debacle. With all signs pointing to a complete rebuild have I finally bitten off more than I can chew? Will I ever drive this car again? Can I repair this car before its rusts completely away? Tune in next time and find out. 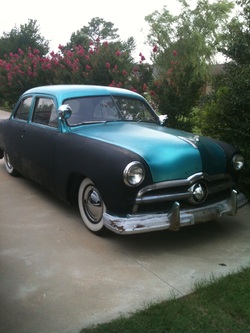 A couple weeks ago I picked up this 1949 Ford deluxe 2 door. I chose it for a number of reasons. Not the least of which was the fact that I could drive it home. The ride home was actually not that dramatic, it would go and stop, albiet the stop was better than the go. I figured that if I bought one out of town I'd either have to tow it or rent a trialer. A couple hundred bucks to just get the thing into my driveway didn't sound too good. Also I picked this one because it had a fresh back window. That's about 325 without the rubber trim. along with the back window there were a number of replacement patch panels for all the rust holes, of which there are plenty. It has the original flathead V8 under the hood. When I got it it was painted, poorly, lime green. I have since taken steps to switch up the paint scheme. Some black and gold should do the trick. The first thing I thought I'd do is fix up the wiring as it was starting a little hard and the wires looked ROUGH. I ran down to the parts store after taking a look at what I had to work with. So after I did a little research I settled on some Accel 7mm wires and a 42,000 volt Super stock coil. I knew I wanted to eventually upgrade to the electronic ignition conversion that PerTronix makes so I made sure that the coil I chose wouldn't cause any problems. The PerTronix Ignitor system is a bolt on kit that take the place of your points under the distributor cap and can be had for around 75 dollars and if it saves me from having to maintain a points setup it is well worth it. Not to mention more accurate timing, longer spark plug life, more horse power, greater efficiency, ect. I'll make a post about the install process when I get it in. 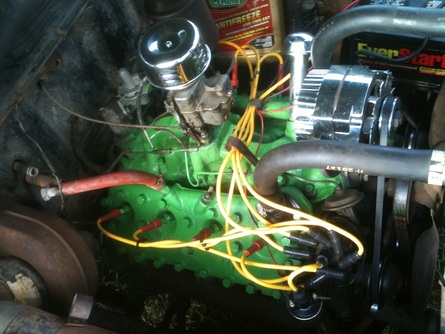 This is the result after I cut down the new wires to fit and installed them. She starts up now instantly and seems to have more power. There's a pretty nasty tick coming from beneath the intake manifold that I'm going to to invsestigate soon. I have big plans for the car including a new wiring harness, remote battery, new fuel tank, a flex fan, and just general upgrades where I can fit them in. |
Categories
All
Archives
September 2019
GREen BibleAerostar CoilsFloorPans© 2018 Aaron Starnes.
All Rights Reserved. |




 RSS Feed
