AARON STARNES
  • Home
  • Writing
  • LLC
  • Contact Me
  • '49 Ford Blog
  • Adventure Blog
  • Project Pics
  • Home
  • Writing
  • LLC
  • Contact Me
  • '49 Ford Blog
  • Adventure Blog
  • Project Pics
Search

Something Drastic: New Valves for the Old Ford

3/27/2013

0 Comments

 
Picture
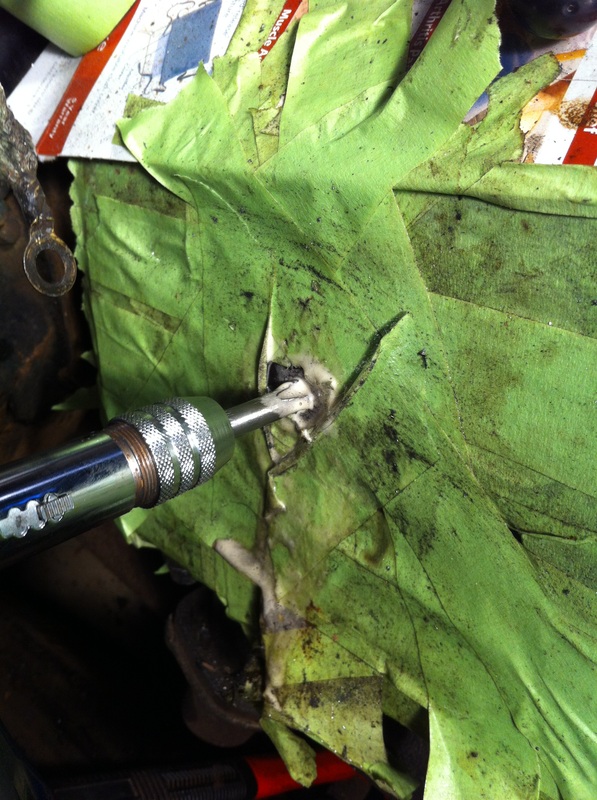
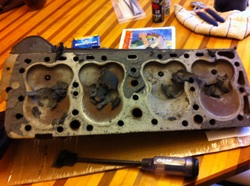
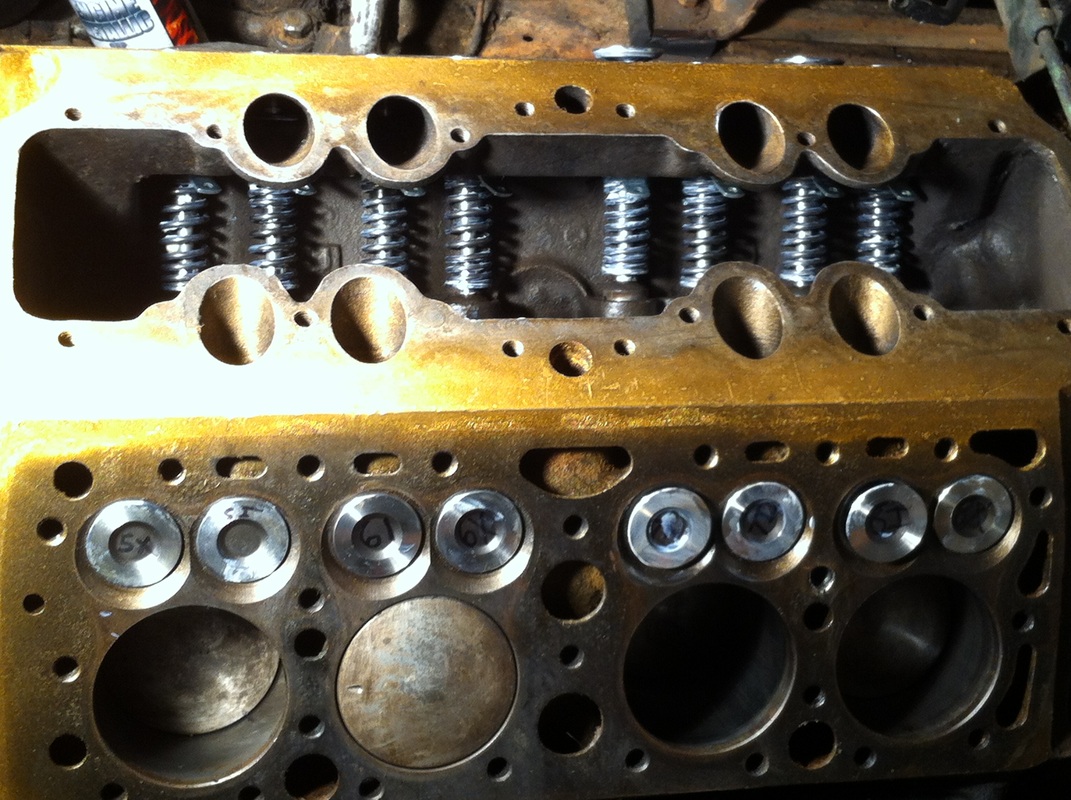
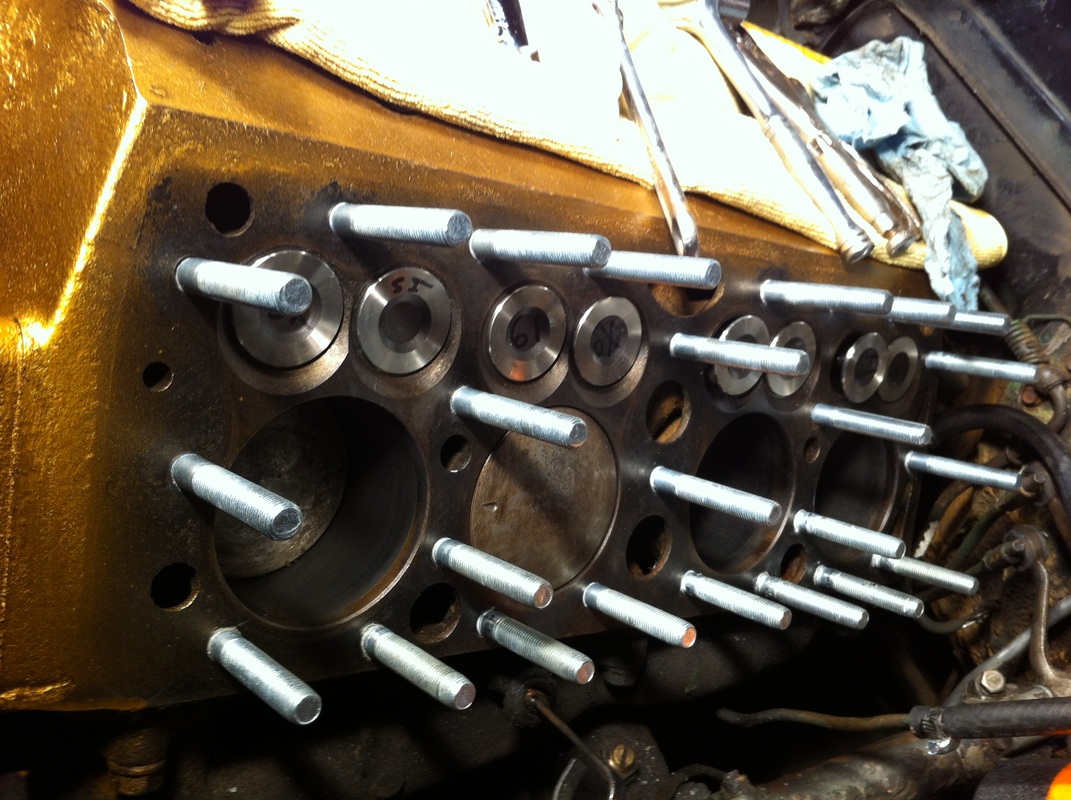
In a previous entry I mentioned a nasty tapping noise which I thought I fixed by installing a new valve spring retainer. I pulled the intake off my flathead and installed the retainer. I thought that I had the problem licked, but with very little driving the nasty tap tap tap came back. I knew to fix it for good I'd have to get in there deep. So it was off with her heads! 
This was a pretty daunting task since many of the bolts holding the heads on go down into the water jacket within the block which causes them to corrode and not want to come out.  On top of that there are 48 of the buggers not to mention I'd never done anything like this before. I spent an evening taking the head bolts out with the help of my buddy Spencer. Together we managed to get out all but 2 which twisted off in the block.It was precisely the same bolt on both sides leaving me with a big problem. With the broken bolts stuck in the block I could not replace the heads until I got them out of there.
I tried every trick I could think of to remove them. I consulted every online forum I could and even asked some oldtime mechanics what they would do. I had a lot of good input, and I tried it all. In the process I busted my knuckles and 2 different kinds of bolt extractors (which then had to be extracted). Unfortunately none of it worked. I ended up using a drill to punch a hole big enough to fit a rat tail file into then chucked said rat tail file into a drill and annihilated the the broken bolts. I then tapped the holes for new hardware.  
I can't say I recommend this method because it was laborious, time consuming and it got a TON of metal filings down into my water jackets in the block. As you can imagine this was a pain to get it all cleaned out but with patience, a magnet and a couple flushes I'm content I got things as clean as I could. 

At the end of the day it worked though and that's what matters.
Picture
Tapping new threads into the old hole.
While I had the cylinder heads off I took the opportunity to clean them up. They had lots of built up paint and crud on them, so I stripped, sand blasted and painted them. You can read about that process here. Before the final install I also ran a file over them to knock down any irregularities on the mating surfaces.
Picture
With the broken bolts finally out I could concentrate on the task at hand. I started taking apart the valve train and quickly realized it was all toast, and that tapping noise was actually caused by a broken valve guide.

I also saw that I had a stuck exhaust valve on one cylinder. I started looking around on the internet for new valve-train parts and stumbled onto Third Gen Automotive out of Nashville, Tennessee. 615-293-9985
Picture
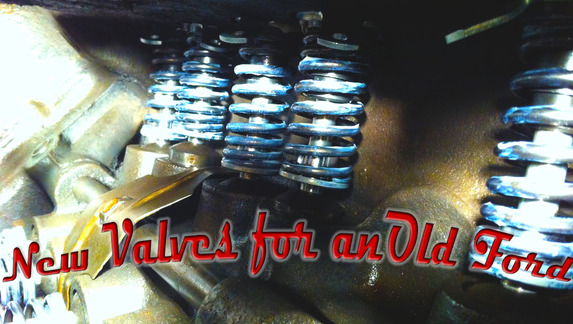
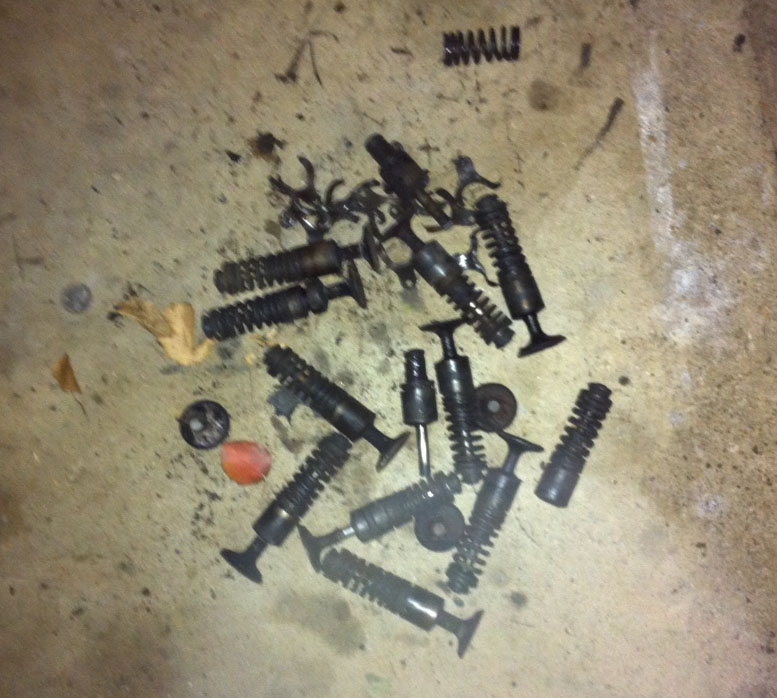
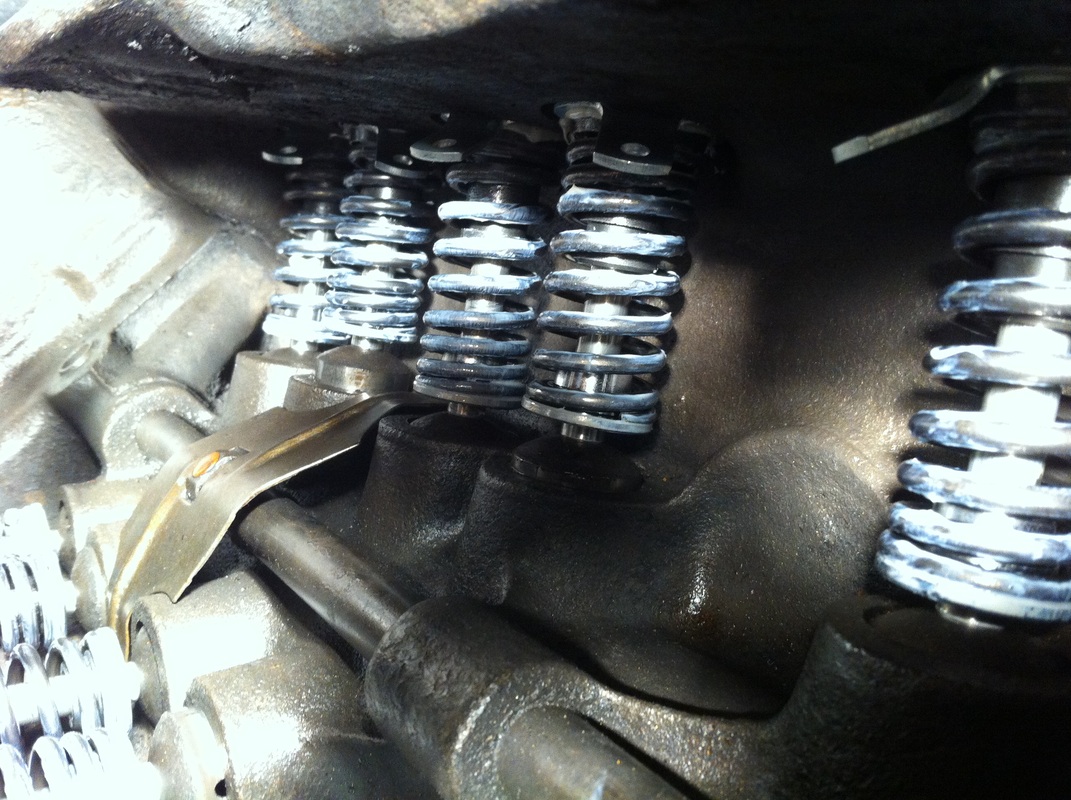
Third Gen was awesome to work with. I called the them up and told him my issue. He had tons of technical knowledge and had the parts to me in a timely fashion for less money than I had anticipated. I ended up ordering an all new valve-train. All new valves, guides, springs and retainers. 


The first step was to get the old roasted stuff out. Years and years of carbon build up had the original valve guided locked into their spots. The valves were almost impossible to get out. It was a long and brutal process with me spitting and cussing the whole time. This was without a doubt some of the most grueling work I've ever done one any project. 
With the old stuff out of the way and everything cleaned up it was time to bring in the new. Each new valve had to be labeled as to which cylinder it came from and what it's function was intake or exhaust. 

After everything was labeled and the guides were all mocked up I set to the tedious task of hand lapping each valve to make sure it fit it's valve seat perfectly. Then I put together the valve assemblies with the springs and retainers and threw the whole lot in the freezer. In the freezer the valve guide seals will contract and make installation easier.
Picture
Out with the old. Here are all the old torched valves, springs and guides.
Picture
6th cylinder intake and exhaust
Picture
New Valve assemblies installed. Sooo clean,
Finally, I was able to put everything back in it's respective place. Here I've got the heads and intake of with all the valve assemblies lapped labeled and installed.
Picture
Once the valve-train was in I could put my heads back on. To hold them down I opted to order a stud kit. No more snapped bolts for this shade-tree mechanic. So I slapped my heads back down on top of my cylinders, put the whole thing back together and got her ready to fire.

The last thing I did was fill the radiator, a pretty straight forward task right?

Imagine my disappointment when water started pouring out from under the right side head. I had installed my head gaskets on the wrong side! So after I pulled the heads back off and cleaned them up I re installed them with fresh gaskets.
Picture
Here is a details shot of the installed stud kit. Speedwaymotors.com
Picture
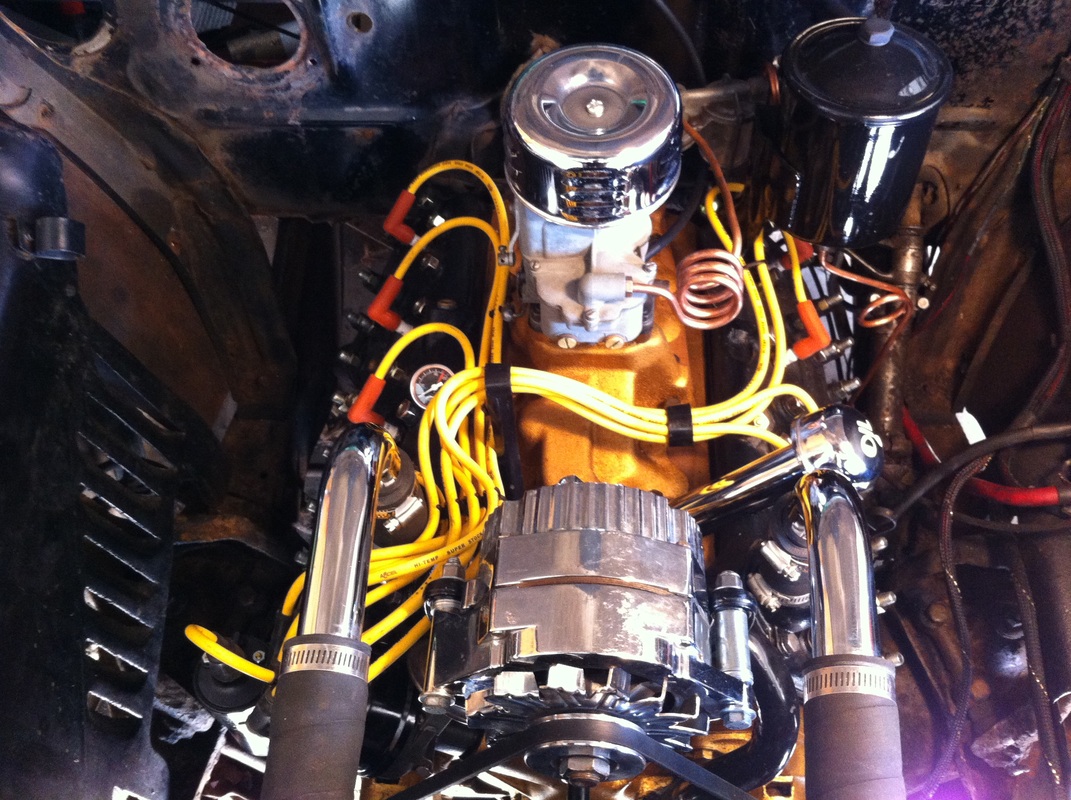
Ready to Rock!
I got everything back together and crossed my fingers. The moment of truth. I cranked and she wouldn't go. Turns out I had my plug wires on wrong. I rewired and tried the starter again. HALLELUJAH she busted off! It was immediately worth every cuss, bruised elbow and every bloody knuckle. I was so excited I couldn't wait to get in and do some shakedown runs. 


 The very same weekend I got it started I drove it into town and had an old flowmaster I had in my shop welded up behind that old flathead. This is just about the sweetest, most gratifying sound I've ever heard. I shot this short video so you can hear it run too.

Picture
Me and the Machine

Back to Blog

0 Comments


Leave a Reply.

    Categories

    All
    Body
    Brakes
    Driving
    Engine
    Floors
    Fuel System
    Glass
    Interior
    Suspension
    Wiring


    Archives

    September 2019
    July 2019
    January 2019
    October 2018
    August 2018
    March 2016
    December 2015
    November 2015
    September 2015
    June 2015
    August 2014
    July 2014
    June 2014
    April 2014
    March 2014
    January 2014
    December 2013
    November 2013
    August 2013
    June 2013
    April 2013
    March 2013
    January 2013
    October 2012
    August 2012
    July 2012
    March 2012


    GREen Bible


    Aerostar Coils


    FloorPans​

    Picture

    RSS Feed

    © 2018 Aaron Starnes. 
    ​
    All Rights Reserved.
Powered by Create your own unique website with customizable templates.
  • Home
  • Writing
  • LLC
  • Contact Me
  • '49 Ford Blog
  • Adventure Blog
  • Project Pics