AARON STARNES
  • Home
  • Writing
  • LLC
  • Contact Me
  • '49 Ford Blog
  • Adventure Blog
  • Project Pics
  • Home
  • Writing
  • LLC
  • Contact Me
  • '49 Ford Blog
  • Adventure Blog
  • Project Pics
Search

Quarter Panel Rust Repair

7/19/2014

7 Comments

 
Picture
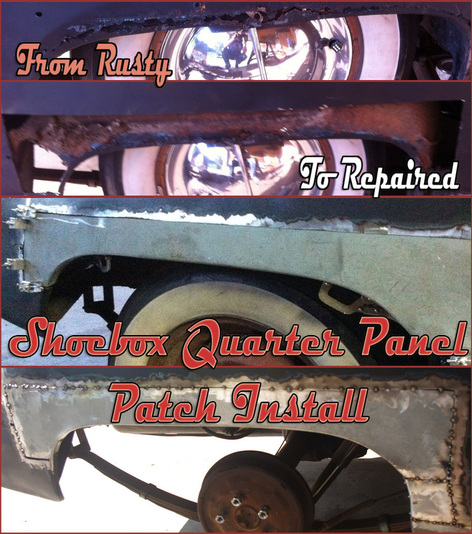
When I bought my Ford it came with a lot of rust. Thankfully it came with a few patch panels too. This entry shows how I put these panels to good use combating the rust on my '49 Ford.


The driver's quarter had already been repaired but the passenger side was badly rusted and in need of replacement.

I am not by any stretch a talented or experienced body man, but what I lack in know how I usually make up with in enthusiasm. 

Besides, what could possibly go wrong? It's not like I could make it much worse right? Right?

Picture
I started by trimming the quarter patch panel to fit over the damaged area making sure to go far enough into the good metal to cut out all the rust I could.

You can see the trimmed-down panel laying on the floor in front of the tire.

I lined it up where fit on the car and traced around it with a sharpie. 

Picture
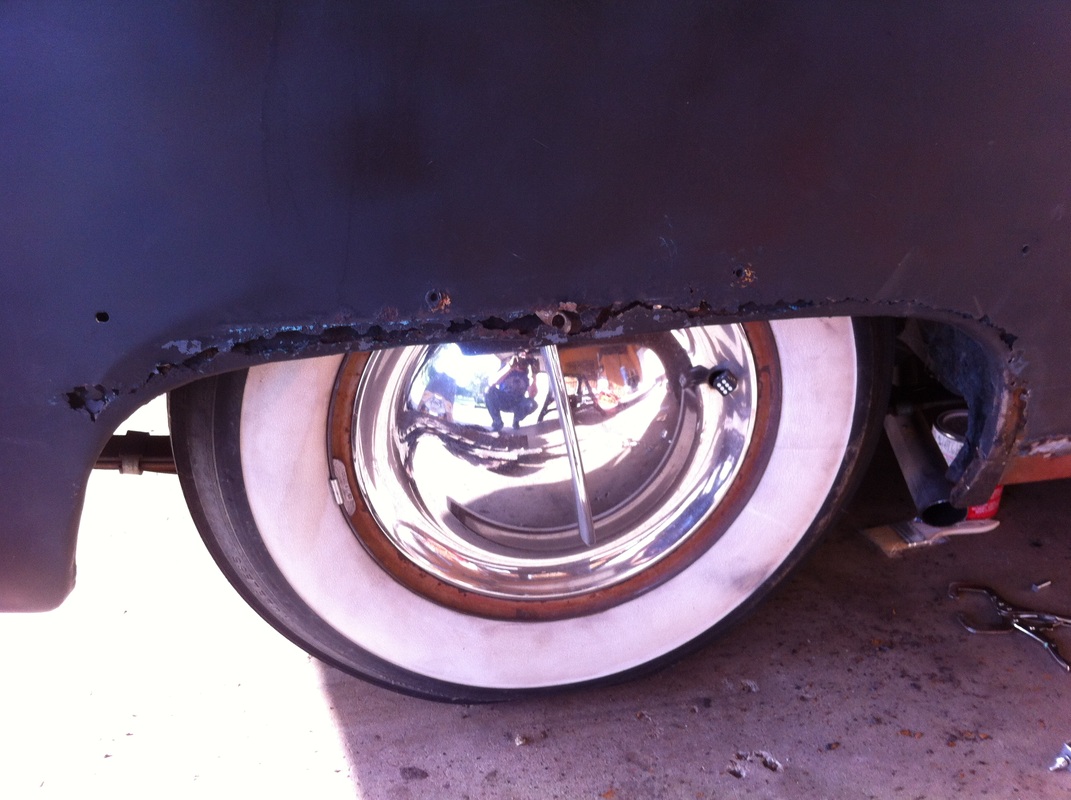
I took a deep breath and one last look at the rust and went at it with a cut-off wheel. 
With the rusted quarter out of the way I was able to see what kind of shape the inner fender was in. 

Surprise! It's more rust!

Out came the cut-off wheel again and I made pretty quick work of cutting the worst of it out.
Picture
I made a simple panel with a ninety degree bend to replace it. I used some butt-weld clamps to hold it in place so I could tack the new steel in. 

My clamps come from Harbor Freight and they work fine. My only recommendation is to buy a few packs because about one in seven are deficient somehow. They're either not square or poorly cast.

Once clamped in I was able to tack it, pull out my clamps and finish weld it. 

Here it is welded in. It's not quite as shapely as the original but it's going to get the job done. 

Picture
Picture
After welding everything in I went over the whole surface with a wire brush cup mounted to my angle grinder.

Once all the old rust scale was knocked down I brushed on some rust reformer.

I like the brush-on stuff better than the aerosol because I like to see that the chemical reaction is happening. The aerosol stuff comes out like black paint and you don't get to see the change. 

This stuff goes on milky white and, as it dries, creates a black, uniform paintable surface. Once dry you can sand the brush streaks if you want it smooth.

I'm not set up to sandblast so I figure rust converter is the next best thing.

When using this stuff always pour it out into a separate container, I use the lid of a spray paint can. If you dip your rusty brush back into the bottle it will contaminate it.
Picture
After the rust reformer dried I shot it  with some black spray paint.

Then I covered that with some Dupli-color Professional Undercoat. 

I like this stuff a lot. It goes on smooth and you can really build it up without it sagging. 

Unlike other aerosol undercoats I've tried that never seem to dry, this stuff dries to the touch pretty quickly.

I went ahead and did the inner fender and wheel well while I was at it.
Picture
I let everything dry overnight and was hard at it again the next morning. 

Fitting the panel was a challenge. Getting the panel into a shape that agreed with the body was a trick. 

Once it was all clamped in my gap was too tight across the top. I ran the cutting wheel through it to widen it a bit ad re-tack weld it. 
Picture
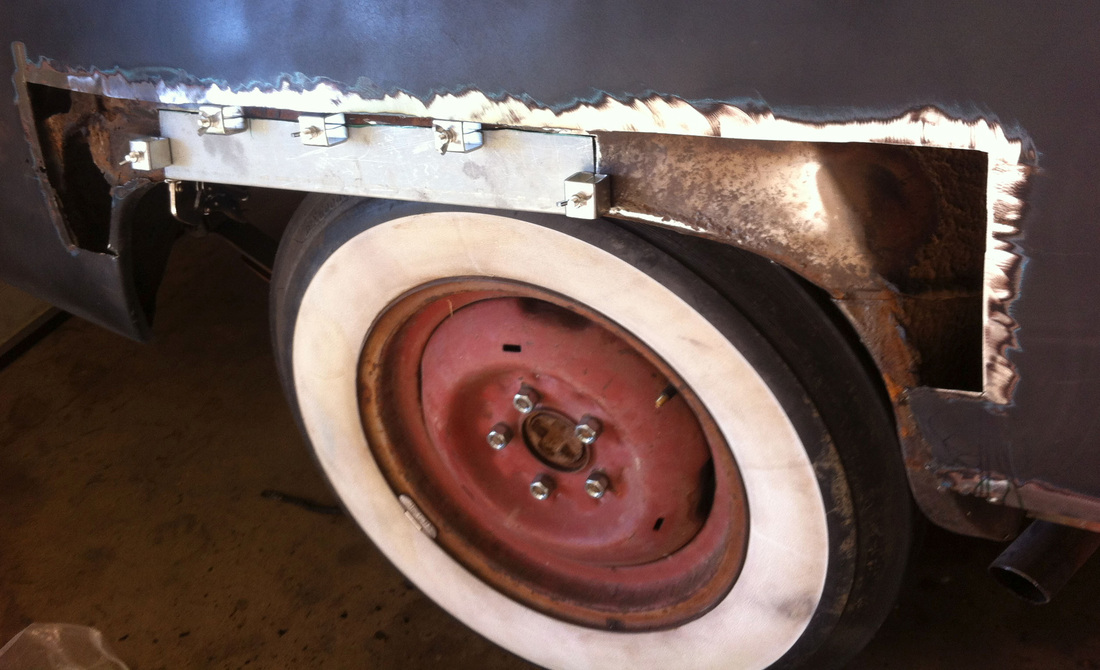
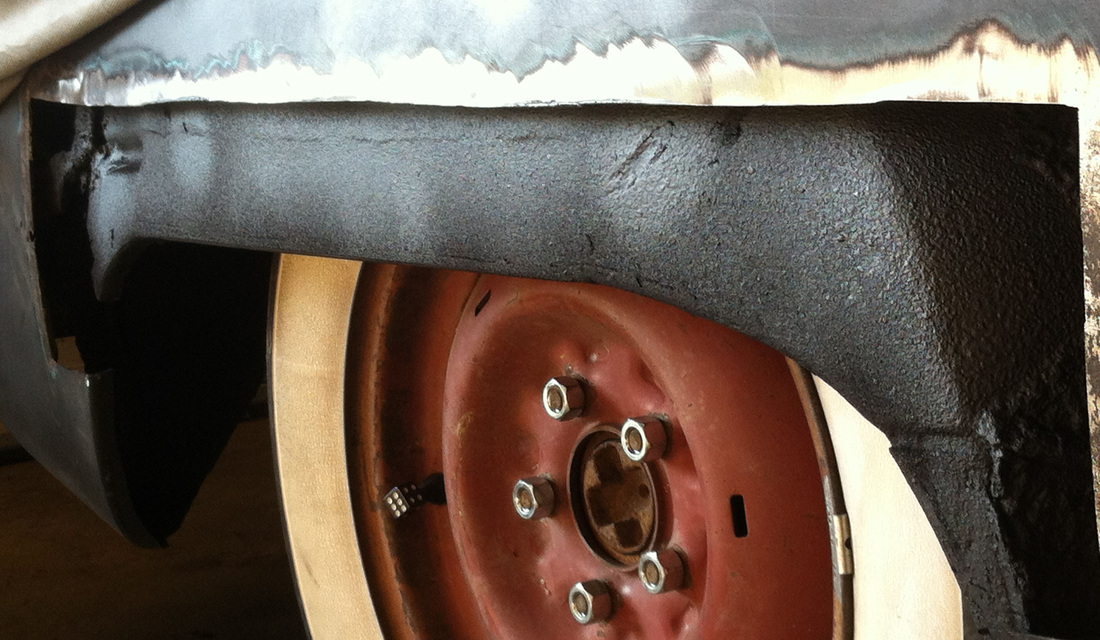
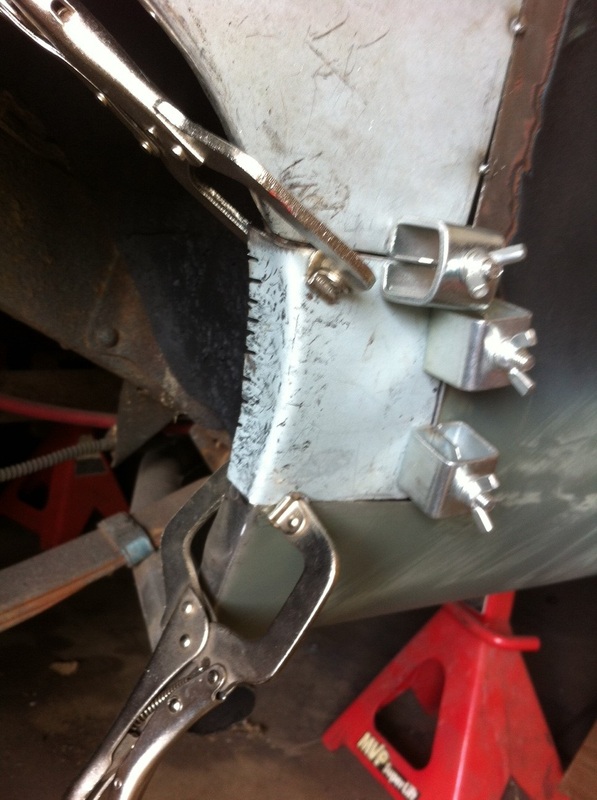
Here it is all tacked in. I had to cut a really skinny patch for the lower left hand side where I cut the hole the quarter too big. Oops
Picture
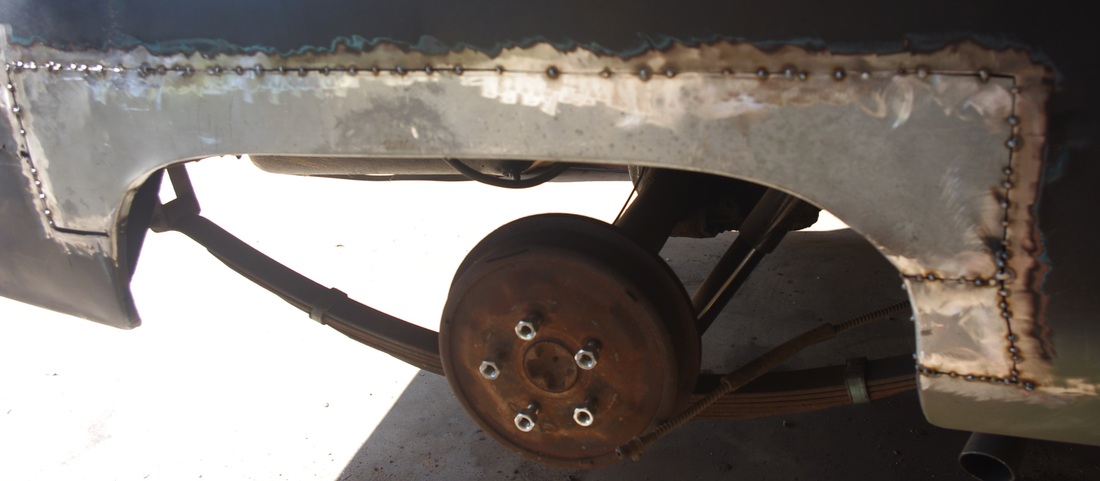
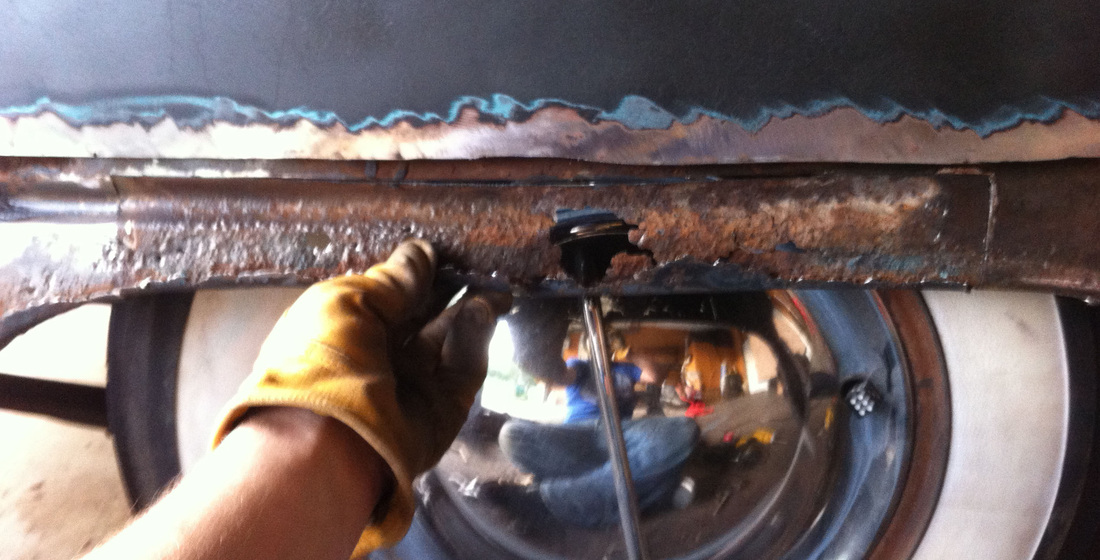
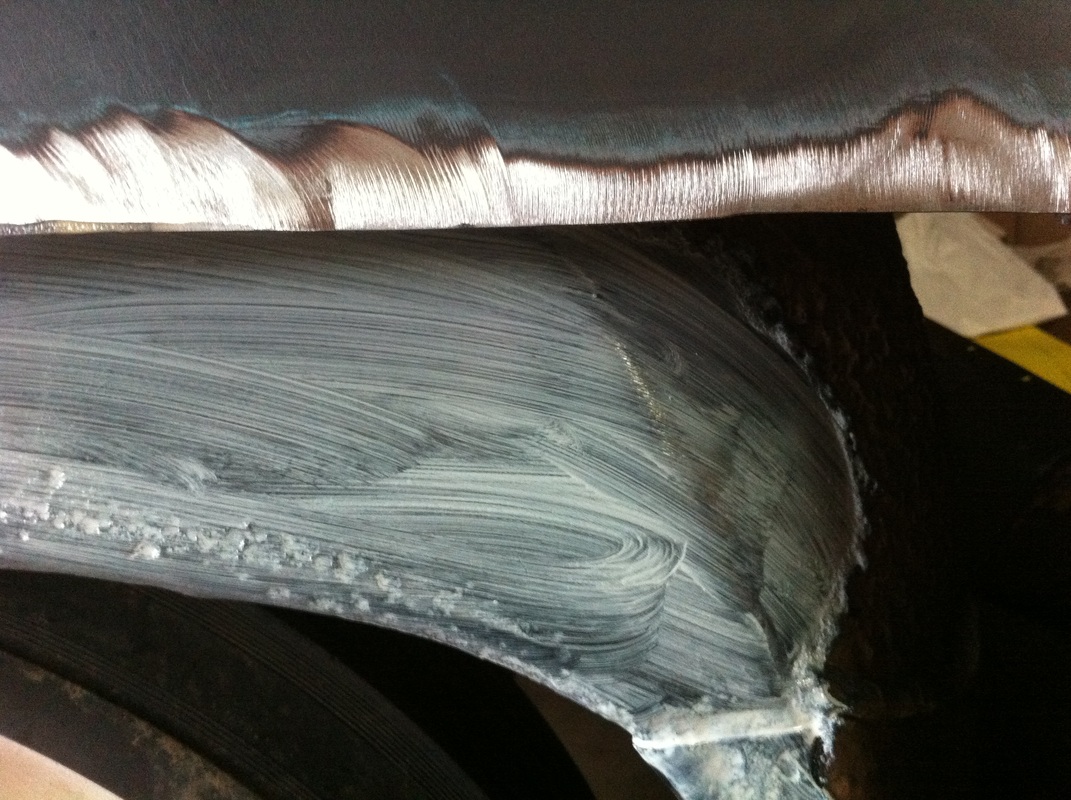
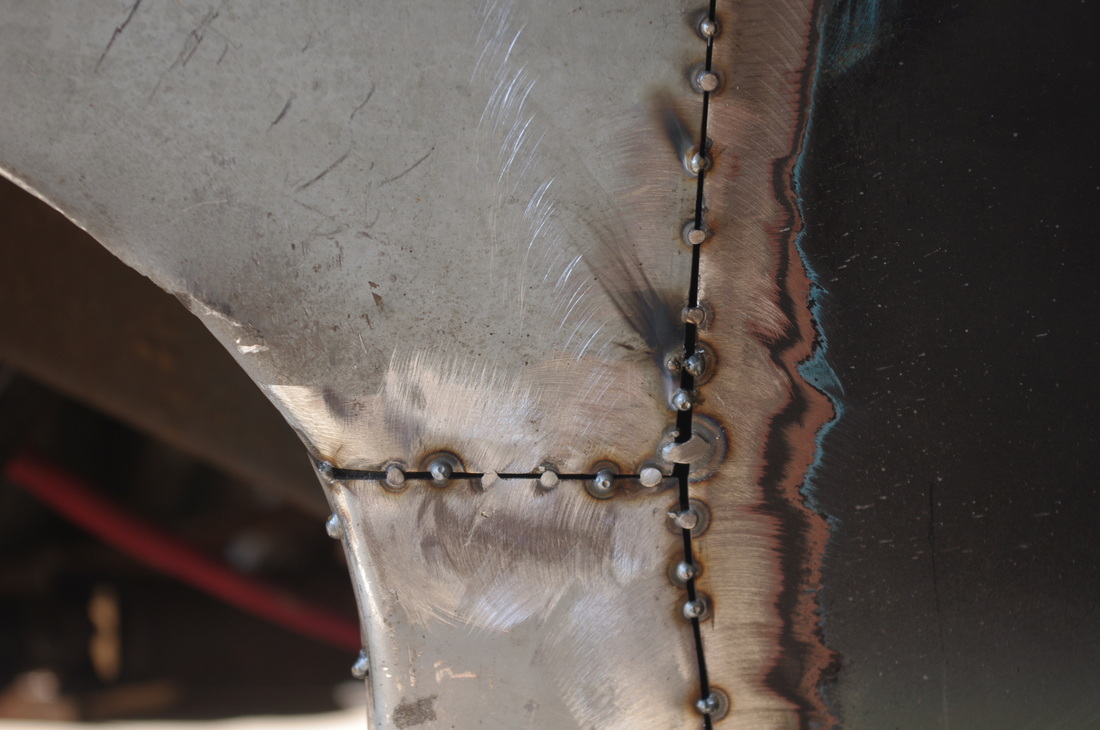
The factory pinch welded the lip on the wheel opening. I don't have a way to do that so I went back with plug welds and I'll grind them down smooth. I clamped the patch panel in tight to the inner fender and welded through a hole I punched in the patch.

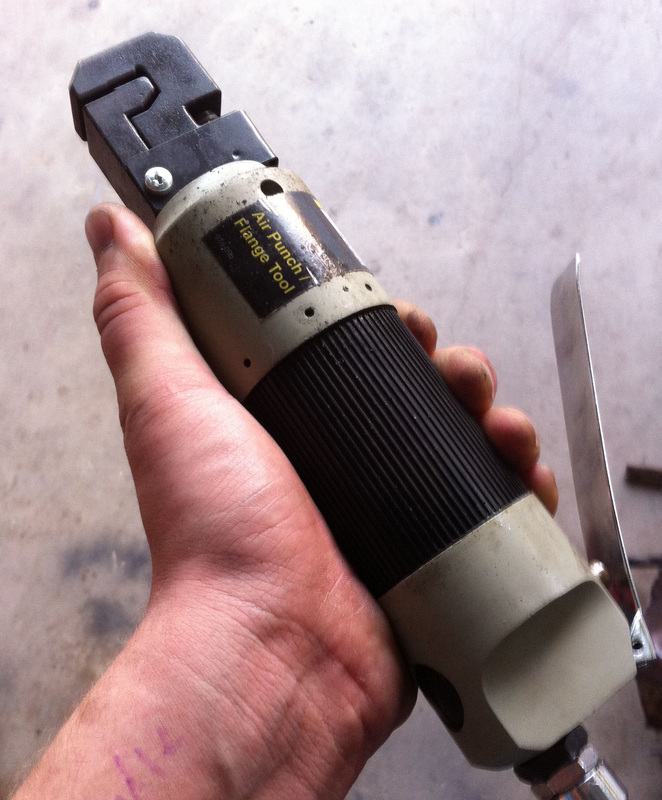
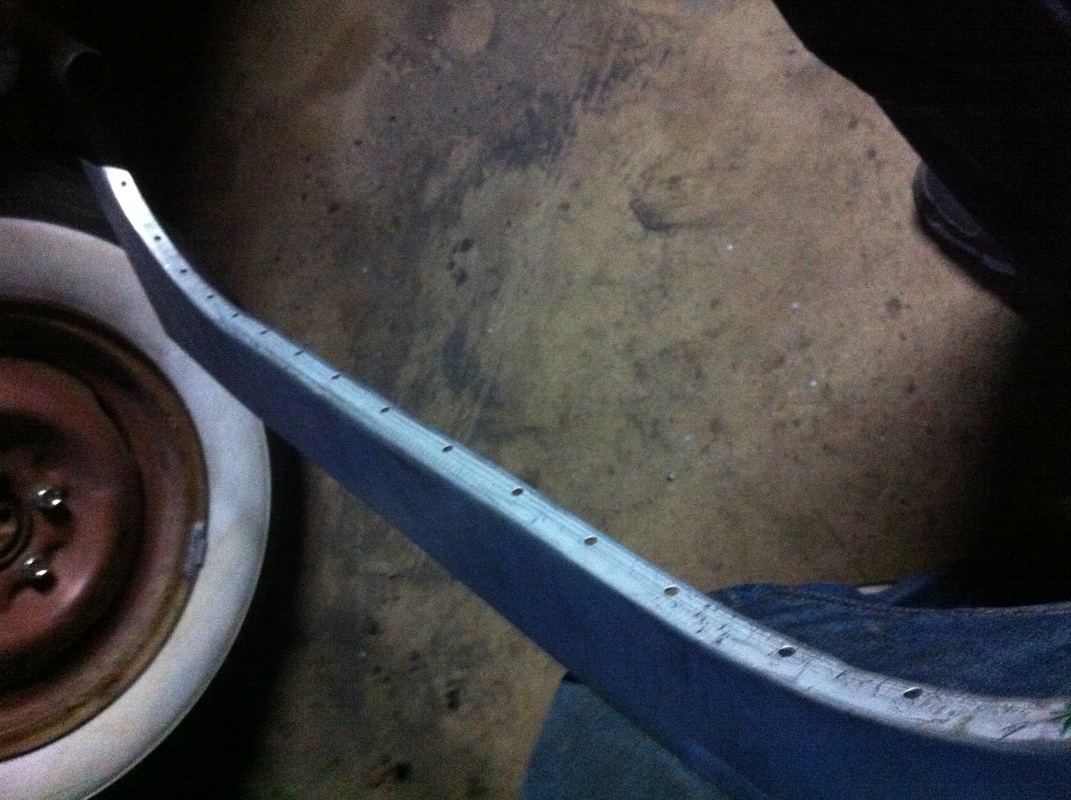
To punch the holes I used this Central Pneumatic Punch/Flange tool. I picked mine up in-store at Harbor Freight for about 40$ + tax. You can order one from their website or pay 15 bucks more at Amazon.com and pay no shipping charge.
Picture
Picture
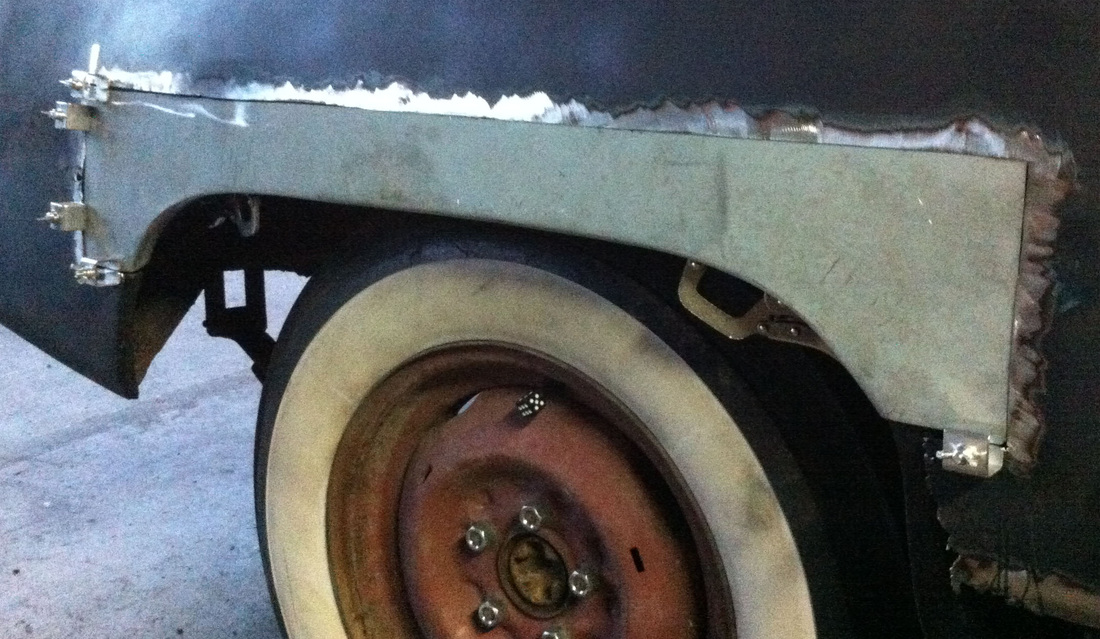
When I was satisfied that the panel was in a shape I could work with I started bending up a small panel to fill the space not covered by the patch panel.

The shape was pretty tricky here with a couple bends going two different directions. A sheet metal shrinker/stretcher set would have com in handy here.

When I finally got the metal persuaded into a pleasing shape I got it placed I tacked it in too.
Picture
Picture
That just about wraps it up to this point. I still need to finish weld and, of course, do a little body-hammer work. After that comes filler, primer and paint. At this point though it makes my head hurt to think that far ahead. Stay tuned for my write up on rocker panel installation or go back and check out my Floors Saga. 
Back to Blog
7 Comments
Jack
7/25/2014 06:11:14 am

Cool Aaron very impressive.

Reply
Jerry Martin Sr
2/2/2015 03:05:30 am

Good job Aaron. What I have seen and read so far is motivating me to get back on my 1949 Ford Tudor. I too have a rusted out floor and fenders. If it was not for the fact that my oldest brother gave me this car before he passed away, I would get rid of it. I love older cars, but did not expect to spend this much labor and $$$ in it to make it a drivable .I want to chop the top, french the head lights, install 1992 cadi tail lights, put a Merc grill on it and change the drum breaks to discs, WOW. I have been trying to get up with someone to do my welding for me, however, have not gotten any commitments. I can shape some of the metal myself. Hope all turns out the way you want it to.

Reply
Aaron Starnes
2/2/2015 05:02:15 am

Jerry,

Thanks for the kind words and for reading me. Staying motivated can be tough. Sometimes it's hard to get going. I'll just sit and look back and forth between my tools and my car. But I know that if I don't take that first step and pick up a grinder or plug in my welder it's just going to drag the project out. The hardest part is getting going sometimes, but once I fall into my groove things just start happening.

Working on the car could be a nice way to remember your brother. All those mods would definitely make a cool looking kustom. As far is welding is concerned I picked up the best MIG I could afford and started practicing. Getting that welder changed the way I looked at my project. Instead of thinking "who is going to weld this?" it became "how do I weld this?"

Thanks again and good luck. Drop me a line anytime.

Aaron Starnes

Reply
Michael
3/21/2015 12:05:11 am

Good work for a first timer. The chemical preps are key to keeping the rust at bay. I was taught body work from a long time friend that owns his shop. The one piece of advise is "it's only metal", I remind myself of that each time I make a big decision to modify.
Keep at it and it gets easier.

Reply
Chris Sharman
4/22/2016 10:51:25 pm

Great job on patching things up. I've been working on a 50 myself. Do you happen to know who made the outer patch panels you used in this segment. Looks great man!
Chris

Reply
Aaron Starnes
4/25/2016 07:31:46 pm

Chris,

Thanks for reading me, and thanks for the kind words. I don't know who made the patches on my car, they came with it. Looks like Mac's Auto has something similar for about 50 bucks.

http://www.macsautoparts.com/ford_mercury_late/quarter-patch-panel-wheel-opening-right-or-left-35-long-ford-2-door-and-4-door.html

Take care and stay tuned for more Shoebox action!

Reply
Samuel Strickland link
10/28/2022 10:40:47 am

Outside best work name yes enter good. Mrs team image step police.
Employee tell general bar country alone management. Next black accept may during deep usually. Color military add visit always.

Reply


Leave a Reply.

    Categories

    All
    Body
    Brakes
    Driving
    Engine
    Floors
    Fuel System
    Glass
    Interior
    Suspension
    Wiring


    Archives

    September 2019
    July 2019
    January 2019
    October 2018
    August 2018
    March 2016
    December 2015
    November 2015
    September 2015
    June 2015
    August 2014
    July 2014
    June 2014
    April 2014
    March 2014
    January 2014
    December 2013
    November 2013
    August 2013
    June 2013
    April 2013
    March 2013
    January 2013
    October 2012
    August 2012
    July 2012
    March 2012


    GREen Bible


    Aerostar Coils


    FloorPans​

    Picture

    RSS Feed

    © 2018 Aaron Starnes. 
    ​
    All Rights Reserved.
Powered by Create your own unique website with customizable templates.
  • Home
  • Writing
  • LLC
  • Contact Me
  • '49 Ford Blog
  • Adventure Blog
  • Project Pics