
People choose to replace the door lock plunger knobs, or "Lock Knobs" in their vehicles for a number of reasons. Whether the originals are broken or unsightly, or they just want to stand out in a crowd. Replacing your door lock knobs can be a very rewarding process, but if one isn't careful it could be wrought with peril and danger.
This is a complex process with many steps so if you're trying to follow along at home I've provided an outline of the steps below and if at any point you get lost you can just go back one step and take a look at the previous on to regain your bearings. Or if you get really lost send me an e-mail and I'll try to get back to you in a timely manor. Or if you're sweating and pulling you hair out consult a reliable mechanic. I'm confident with a little patience and the help of these 9 simple steps you'll have a nice set of knobs that you can be proud of.
OUTLINE:
Step 1: Selecting a door lock knob Step 2: Receiving your knobs (if you didn't order your knobs proceed to Step 5) Step 3: Open the package at one end Step 4: Empty Package Contents Step 5: Remove your new knobs from the manufacture's packaging Step 6: Examine your Knobs Step 7: Locate your vehicles existing door lock knobs Step 8: Remove existing door lock knobs Step 9: Install your new knobs Step 10: Test your new knobs
Note: You must determine how many you need (generally one per door) and make sure you purchase the right amount.
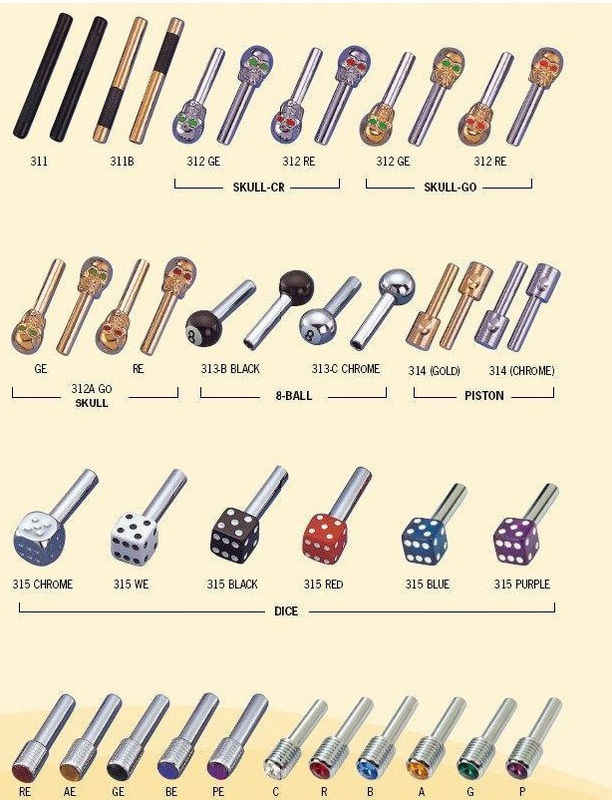
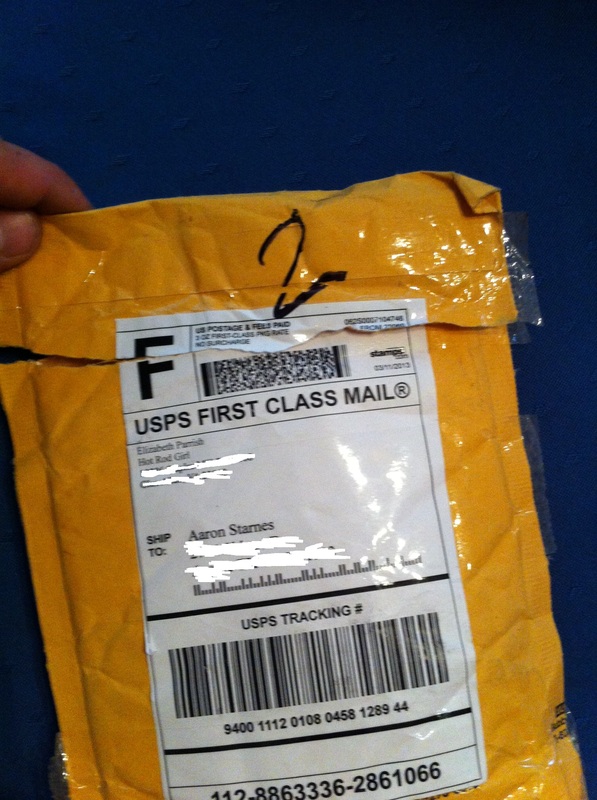 Figure 2 Figure 2
Step 2: Receiving your Knobs
If you ordered your part online it will have to be shipped to you, If not skip ahead to Step 4. The first thing you need to do is get the package out of the mailbox. See Figure 2. Note: Not all packaging will look exactly like this.  Figure 3 Figure 3
Step 3: Open the package at one end
Carefully open the package at one end making sure not to rip any of its contents. You will know that you have opened the package when it looks something like this and you can access it's contents. Consult Figure 2a. 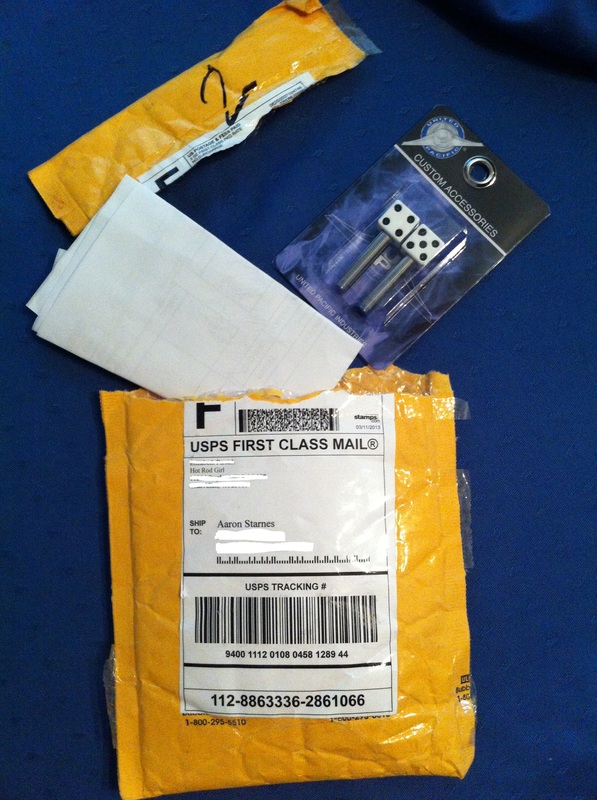 Figure 4 Figure 4
Step 4: Empty Package Contents
Empty the contents of the Package. If you order your parts they should have come with a receipt/packing list. hold on to these documents in case you need to make a return for whatever reason.  Figure 5 Figure 5
Step 5: Remove your new Knobs from the manufacture's packaging
Remove your new knobs from the manufacture's packaging. Our new knobs will come in some type of packaging from the manufacturer. The knobs will need to be removed from the package before you can install them on your vehicle. You'll know when you have completely removed them because they will no longer be inside of the manufacturer's original packaging. See Figure 5  Figure 6 Figure 6
Step 6: Examine your Knobs
Examine you brand new knobs for any defects either from the factory or incurred during the shipping process. You'll know you'll need to replace them if they are ruined. 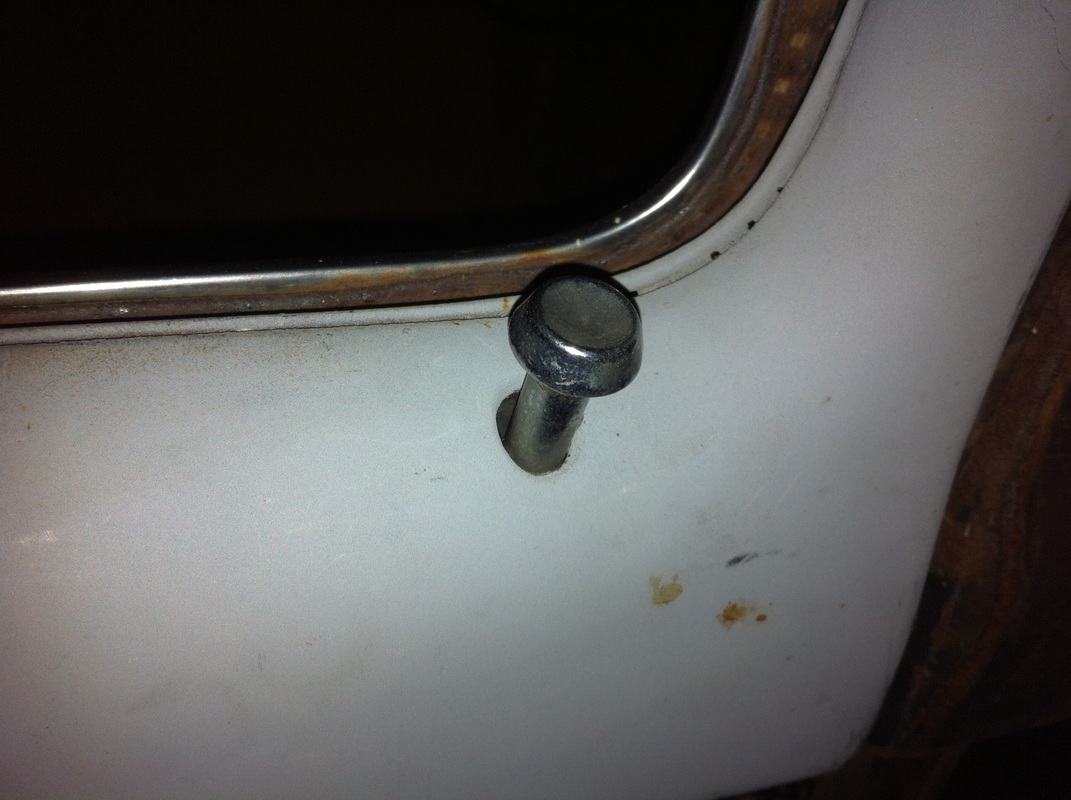
Step 7: Locate your vehicles existing door lock knobs
Locate your vehicles existing door lock knobs. They should be located somewhere on your doors. Mine were located on the tops of the doors near the window. 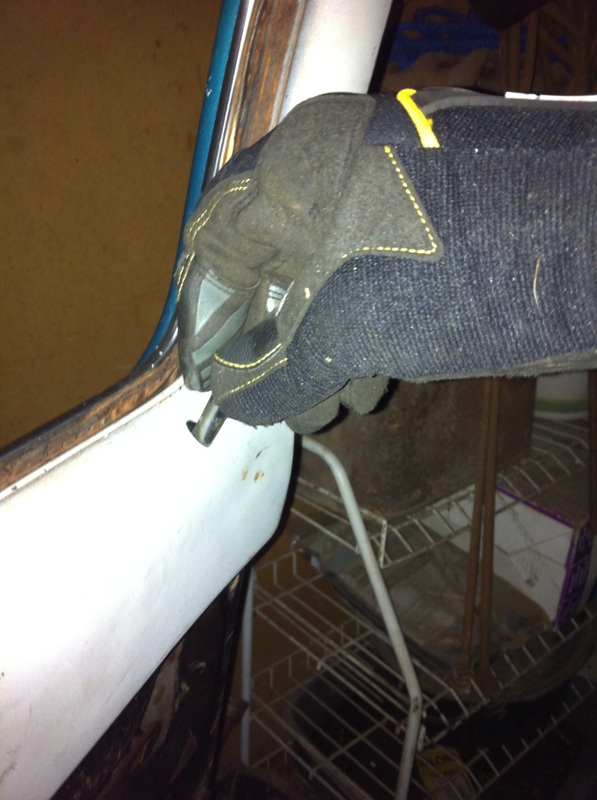 Figure 8 Figure 8
Step 8: Remove existing door lock knobs
Using the proper protective gear and remove existing door lock knobs by turning them in a counter-clockwise manner until they have been removed. The exposed plunger should look something like this. Notice how there is not a door lock knob on the threads shown in Figure 8a. 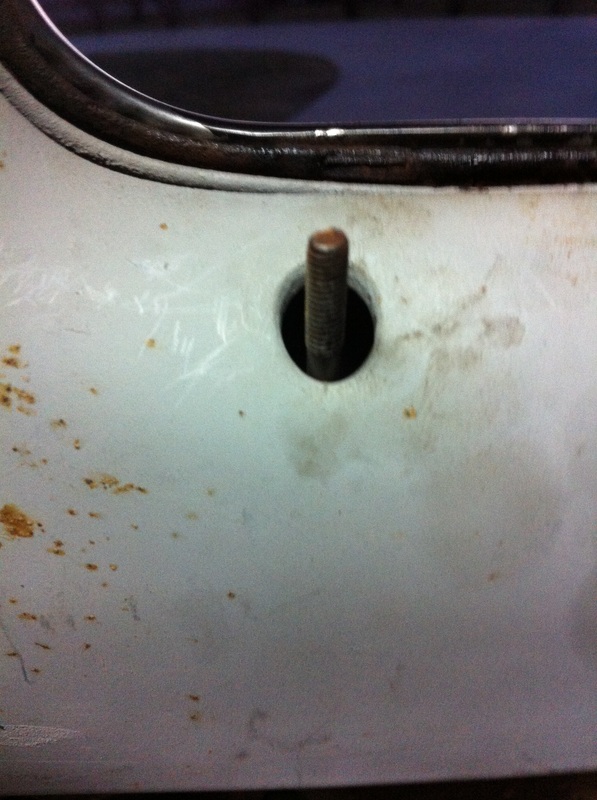 Figure 8a Figure 8a
If you are feeling lost try going back a step until you are confident enough to proceed. 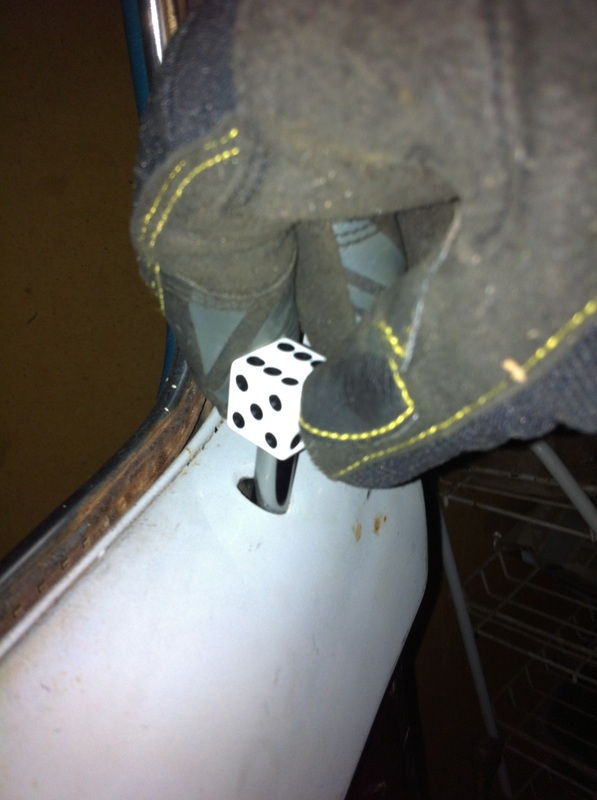 Figure 9 Figure 9
Step 9: Install your new knobs
Install your new knobs by aligning the hole in the bottoms of your new knobs with the threads of lock plunger. Then turn them clockwise until they become tight. 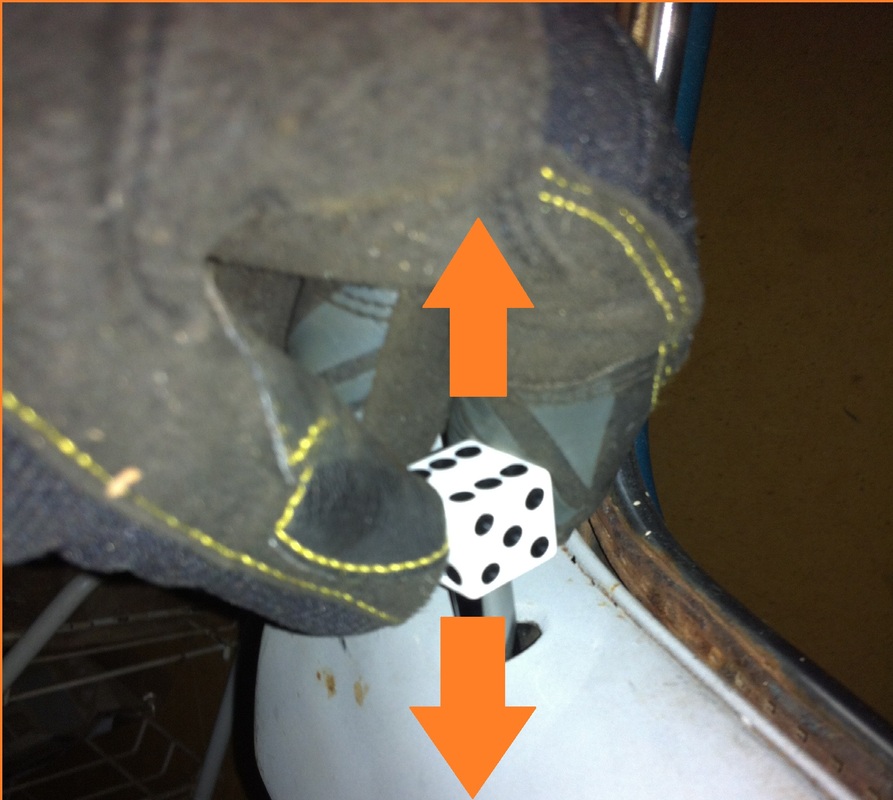 Figure 10 Figure 10
Step 10: Test your new knobs
Test your knobs to see if they actuate the locking mechanisms of the vehicle.If they don't work start over at Step 8. Remember Up for unlocked and Down for locked. If you're having trouble remembering this do what I do and think to yourself Up starts with a "U" and so does unlocked, and Down start with a "D" and so does doesn't open.
Congratulations! You have successfully install your new door lock knobs. If properly maintained they will provide you with years and years of locking and unlocking action, and you can take pride in the fact that you personally installed them. Hurray.
Back to Blog
1 Comment
Zapato
9/10/2013 05:25:03 pm
This is hilarious,you must had fun writing it. Leave a Reply. |
Categories
All
Archives
September 2019
GREen Bible Aerostar Coils FloorPans
© 2018 Aaron Starnes.
All Rights Reserved. |
 RSS Feed
